|


| |

[ Welcome ] [ Instructional Sites ] [ Stitch Directions ] [ Stitching Blogs ] [ Marie's Gallery ] [ About Me ]
[ The Melanie Rose ] [ The Alton Loop ] [ The Griffin Rosebud ] [ The Lazy Daisy ] [ Cast-On Stitch ]

Click
on pictures for a detailed view of each stitch step
Use your Browser's Back button to return to this page
|
 The
Alton Loop The
Alton Loop
|
|
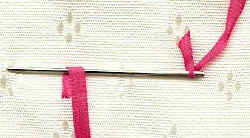 |
Step 1
Bring the loop up at start point. Lay hoop on
flat surface to have hands free. Stretch ribbon out
straight. Place the tip of the needle across the ribbon, to the
desired length of the stitch. Fold ribbon forward over the needle
(loop made). Hold ribbon with left pointer below the needle. |
|
|
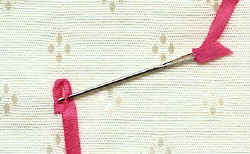 |
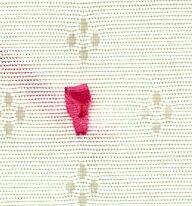
Step 2
Pierce both the folded top ribbon and the ribbon
beneath. Pick up the hoop and pull the needle through. |
|
|
 |
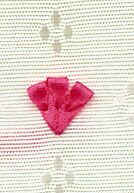
Step 3
When the ribbon is nearly taught, and the curl of the
Japanese ribbon stitch visible . . . stop! This will leave a loop
at the top of the stitch. You will also notice that the curl is
reversed. |
|
The Alton Loop - Variation 1
Five Petal
Flower |
 |
Step 1
Work 3 loops from the same start point.
|
|
 |
Step 2
Center 2 loops in front of the first 3
starting just below the first center point. |
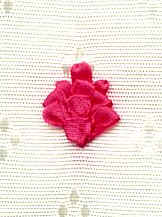
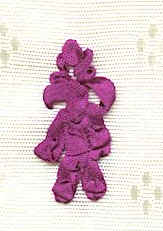
The Alton Loop - Variation 4
Full Blooming
Flora
(Marigolds, Peonies, etc.) |
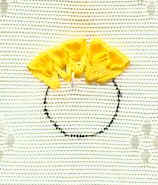 |
For this variation, begin by marking a circle
on the fabric.
In this
example, a 3/8" button was traced.
1st. Round:
Begin inside the circle and make Loop stitch
over the circle marking, with the down-point of the stitch outside the
circle.
Continue stitching Loops evenly around, placing stitches so that the
top edges of the Loops are even. |
|
|
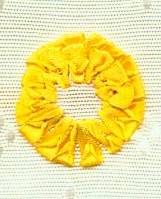 |
2nd. Round:
Work a second layer of Loop
stitches, having the starting point of the stitches 1/16" below the
first round.
Be careful to hold the fabric and ribbon stitches of
the first row between thumb and index finger when taking the needle
down, as you will be going though several layers and do not want to pull
the stitches of the first round out of place. |
|
|
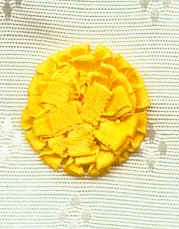 |
3rd. Round:
This round will fill the
center. To attain the fullness desired, measure the ribbon out
longer on the Loops, the fold being even to the top of the round before,
and take the needle down closer to the center. This will encourage
the ribbon Loop to sit higher.
If any bare spots remain at center,
you can insert the tip of the needle through the Loop, and very gently
pull it toward the center. This will force a tiny portion of the
ribbon onto the back section of the Loop, and make it stand higher! |
|
|
|